Sales
Installation / re-installation
Setup / configuration
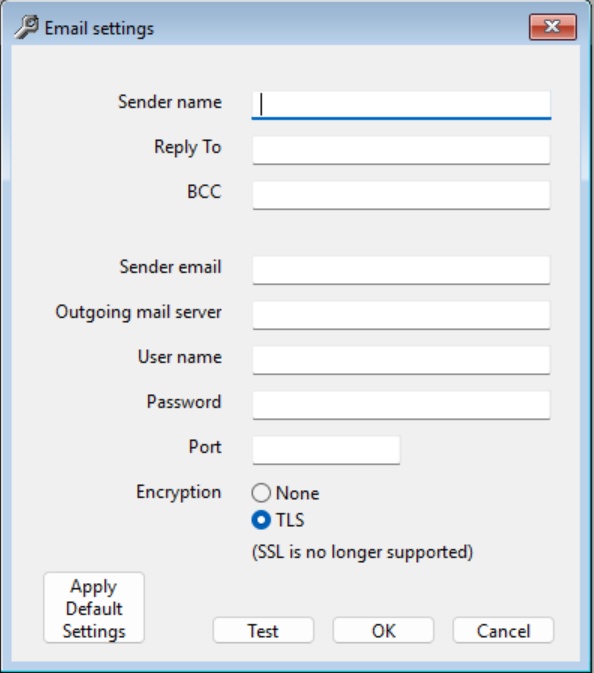
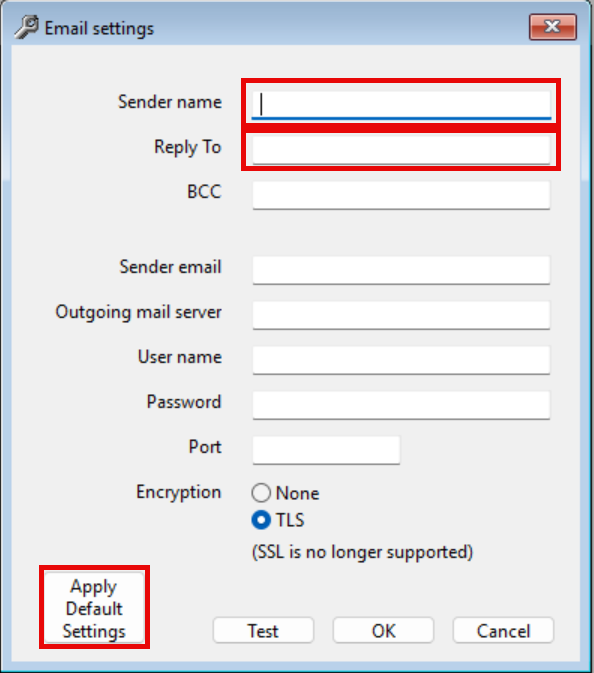
If you choose to use the built in account, you will only have to supply the company name and reply to address to complete the setup. This will send from payrollsolution@iware.ltd through an smtp gateway so that no emails will be retained with the iware.ltd domain. There is no inbox associated with this account either, which is why you will have to supply a reply to address. This account will be hidden from the employees so the email appears to come from your company, and replies will go to the designated address. To use the built in account, click the ‘Apply Default Settings’ button in the Email settings window on the Setup | Company menu.
Click the test button to verify the the settings are correct and working. If so you will receive an email to the sending address or the reply to address depending on the option chosen above.
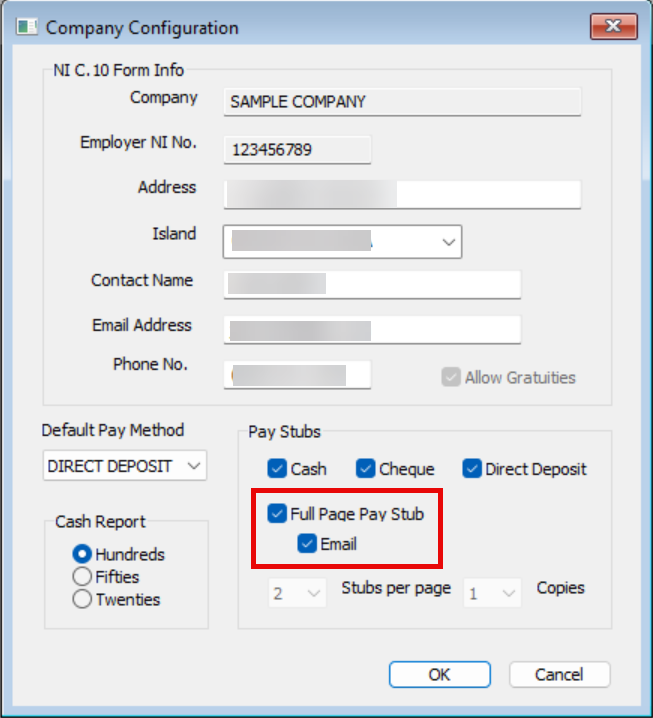
No matter which option you choose, you will now choose ‘Full Page Pay Stub’ and ‘Email’ in the Configuration window on the Setup | Company menu
Next you will enter the individual email address in the Employee profile window on the Setup | Company menu.
Now when you select Pay Stubs on the Processing menu, the stubs will be emailed instead of being printed.
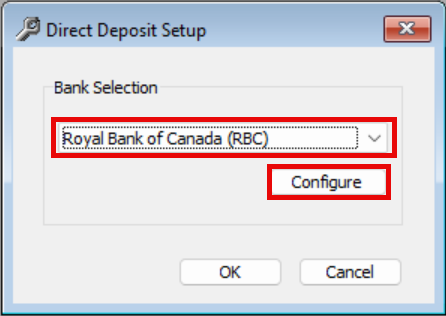 Select the bank from the drop-down list, then click the Configure button
Fill out the data needed for the chosen bank (it will vary depending on the bank)
Click OK to save
Click OK again to close the setup window
Now go to Setup, Company, Employees
For each employee:
Enter the Employee ID
Select the Payroll tab
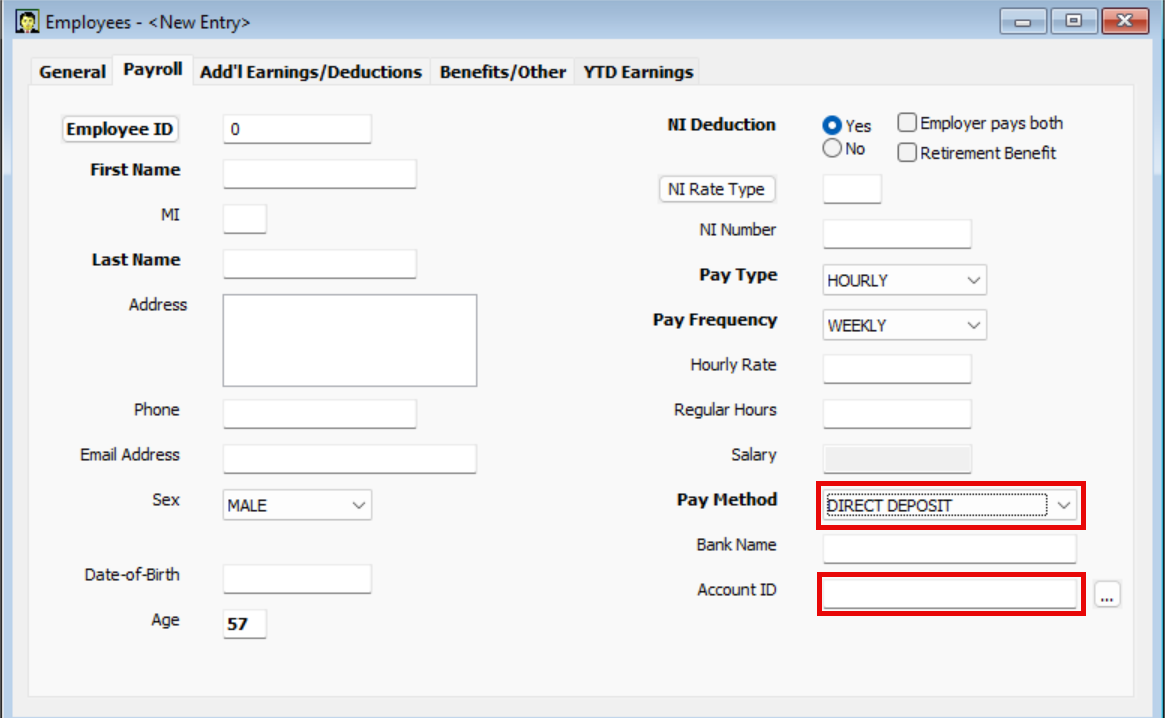
Select DIRECT DEPOSIT for the Pay Method
Don’t enter anything for the Bank Name (that isn’t used for this)
Enter the Account ID format according to the bank
Use the link below to see the helpt for the formatting for each bank:
Account ID formatting for Direct Deposits
(Note: If using Royal Bank Business Pay, enter the employee account number and then click the ‘…’ button to select the bank and branch)
If the employee has a deduction assigned that will be sent to another bank
Click the Add’l Earnings/Deductions tab
Add or edit the deduction to be assigned to another bank
Enter, or click OK to the Amount
Enter the Account ID using the correct formatting as determined above
(Note: If using RBC Business Pay, just enter the employee’s account number)
Click the OK button
(Note: If using RBC Business Pay a popup list of bank and branches will display for you to choose from)
Repeat if there are additional deductions for this employee
Select the General tab and then click the Save button
Processing payroll
This tab is divided into three types:
Previously paid vacation taken this pay period (prior)
Vacation taken this pay period (current)
Vacation to be taken after this pay period (future)
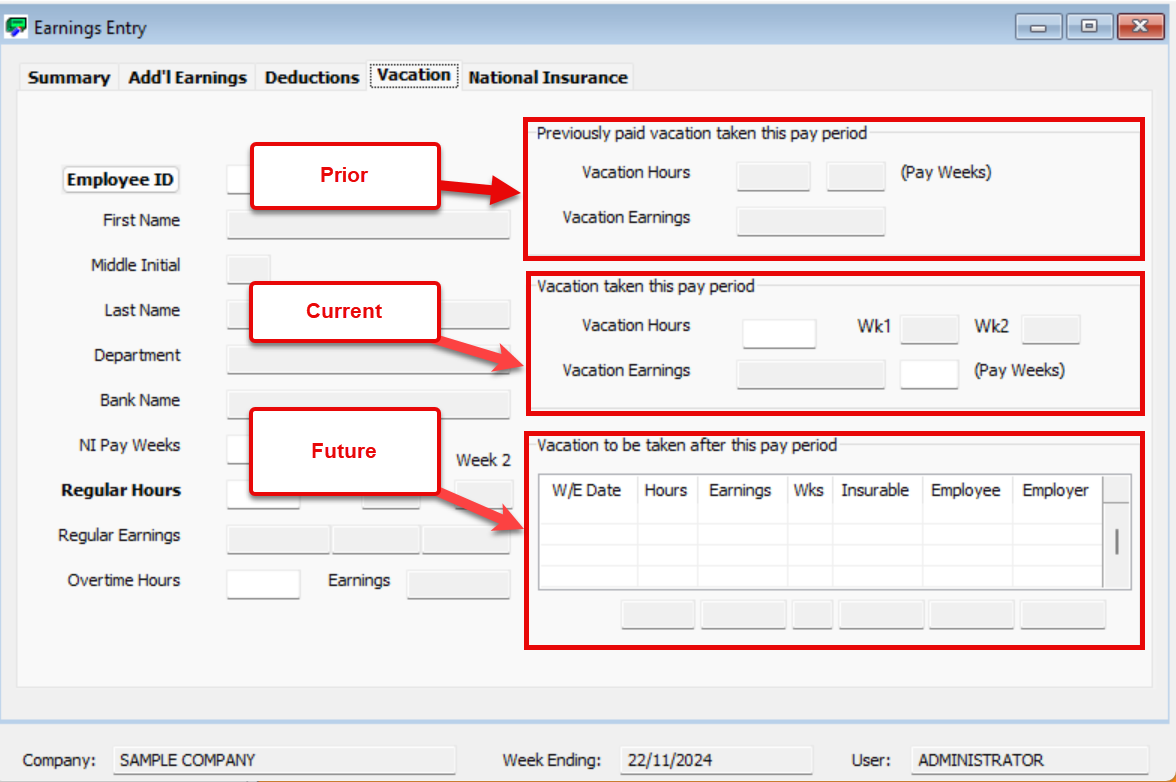
Any previously paid vacation which applies to this pay period is displayed, but cannot be edited.
(This is used in the calculation of the insurable pay and NI contributions, and may reduce the insurable wage ceiling for this pay period)
Next, you may enter vacation hours that are paid this pay period and were taken this pay period.
(This is also used in the calculation of the insurable pay and NI contributions). For example, a single vacation day.
Finally, enter the vacation pay details for any vacation hours to be taken after this period, which are being paid this pay period, in the table.
(The insurable pay and NI contributions are calculated separately for each entry in this table and are added to the current pay period’s totals)
Enter the week ending date and press the Tab button
Enter the vacation hours and press Tab again
The system calculates the insurable pay and NI separately for this pay period
Repeat for additional vacation weeks
IMPORTANT: For Bi-weekly paid employees, enter each week separately if they will be paid for more than one week.
Note: The system will warn you if the vacation hours entered exceed the regular hours for this employee, or if the pay weeks exceed the pay frequency.

The batch status is shown along in the Window title bar just above the main menu. The batch status can be either New, Open, or Closed.
New – No earnings/pay records have been created yet for the current batch
Open – Earnings/pay records have been created and may be edited as needed
Closed – Editing of the earnings/pay records is complete and further processing may occur such as creating a direct deposit file, emailing or printing pay stubs, etc
Editing earnings records may not be done while the batch is closed, and emailing or printing pay stubs, etc may not be done while the batch is open. The batch may be opened and closed as needed during a pay period to complete the necessary tasks using the options Close Earnings Batch and Reopen Earnings Batch on the Process menu.
Reporting
If you want all reports to be saved as PDF files you can use the Microsoft Print to PDF printer that is built into Windows (or another installed PDF printer). Go to Setup, Workstation, Printers and make this selection for the Reports printer and click the OK button to save the selection.
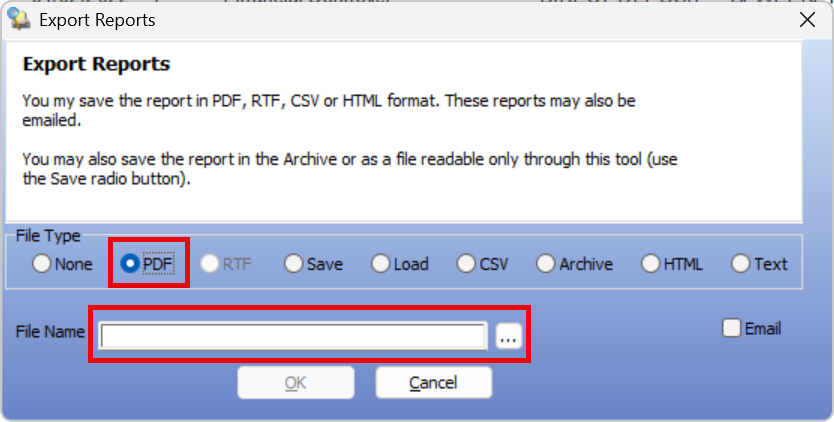
If you want to have control over which reports or when you want the reports to be saved as PDF files, you can use the export button in the print preview window:

Then select PDF, choose a location to save the PDF file to and enter a name for the file: